.svg)
.svg)
.svg)
.svg)
.svg)
.svg)
.svg)
.svg)
.svg)
Using the Oracle public cloud
Juju has built-in support for Oracle Compute, Oracle's public cloud. This means that there is no need to add the Oracle cloud to Juju. An exception to this is if you have an Oracle Compute trial account. Both types of accounts, paid and trial, are covered here.
Warning: Support for Oracle Compute is new (since Juju 2.2) and some sub-optimal traits may still be observed.
This page will cover the following steps:
- Associate Oracle's Ubuntu images with your Compute service. Juju needs these to be able to deploy Ubuntu-based applications.
- For trial accounts, add the Oracle cloud to Juju.
- Add credentials to Juju so it can make use of your Oracle Compute account.
- Create the Juju controller
Information gathering
The email you received upon signing up for Oracle Compute contains vital information you will need to complete the instructions presented here. Look for:
- 'My Services URL'
- 'Identity domain'
- 'My Account URL'
- 'Username' (your email address)
- 'Password' (temporary)
Upon first login (to 'My Services URL') you will be prompted to change the temporary password to arrive at your final password.
Ubuntu images
You will need to make Ubuntu images available in your Oracle Compute account in order for Juju to be able to create Ubuntu-based machines. This is a requirement.
Proceed as follows:
- Navigate to 'My Services URL' and log in.
- Select your 'Identity Domain' in the top-right corner.
- Click on the 'Create instance' box and then 'Create' a Compute service.
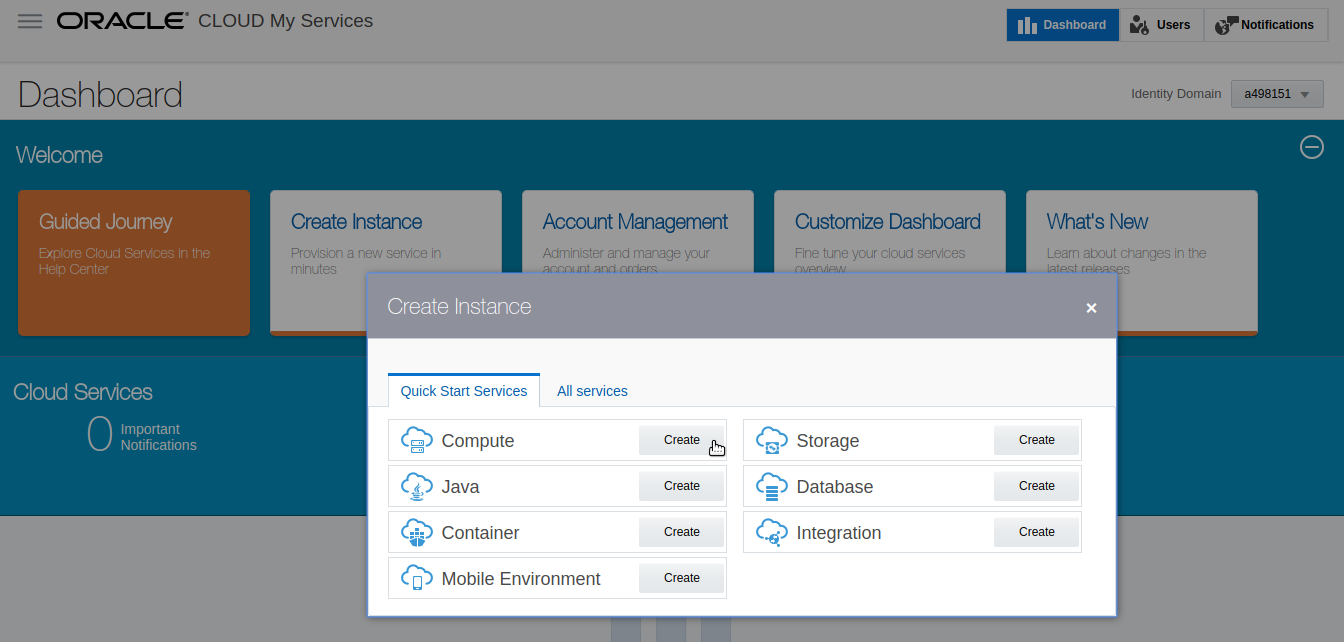
Recall: We are doing this to associate images with your 'identity domain'. We will not be creating an instance here.
Click on 'Marketplace' on the resulting page (left menu), enter 'ubuntu' into the search field, and hit Enter:
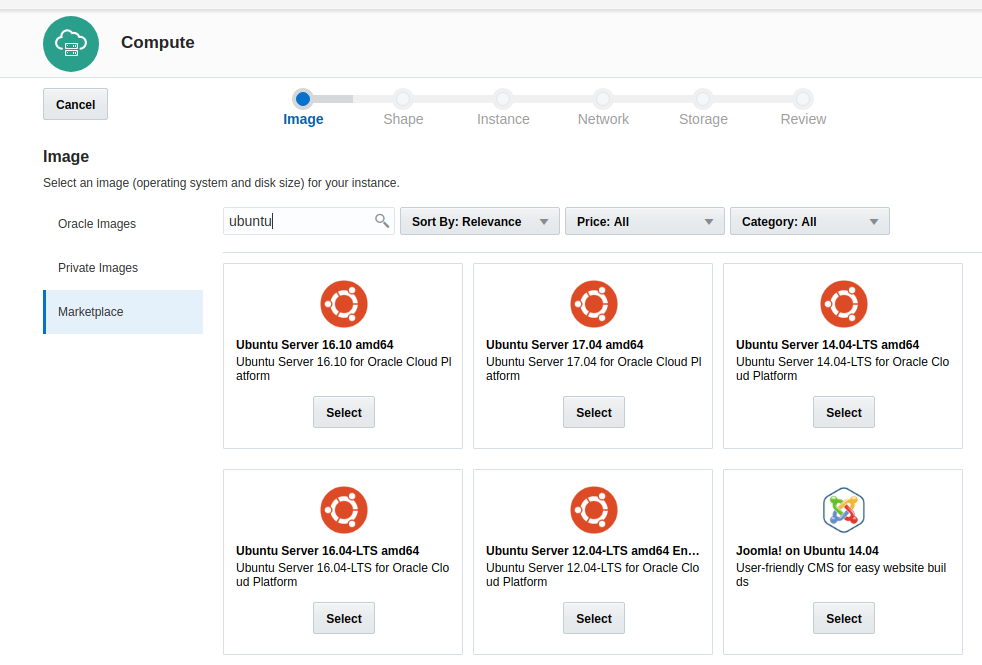
From the point of view of Juju, some images should not be used. Juju-compatible images are listed below:
| Version | Arch | Series |
|---|---|---|
| Ubuntu 12.04 LTS | amd64 | Precise |
| Ubuntu 14.04 LTS | amd64 | Trusty |
| Ubuntu 16.04 LTS | amd64 | Xenial |
| Ubuntu 17.04 | amd64 | Zesty |
Warning: In particular, Ubuntu 16.10 (Yakkety) should not be used with Juju.
Since Juju uses charms to install applications, the Ubuntu series you need are those that the charms were written for. If unsure, it is recommended to add the two most recent LTS releases.
Note: At time of writing, Trusty and Xenial are the two most recent Ubuntu LTS releases.
Select a compatible image from among the official Ubuntu images (orange Ubuntu logo), accept Oracle's terms and conditions, and click 'Install'. Repeat the process for each desired image. These installed images will end up under 'Private Images' in the menu on the left:

Trial accounts
As mentioned, you will need to add your Oracle cloud to Juju if you're using a trial account. This requires a 'REST Endpoint'. To get this, navigate to 'My Account URL', scroll down to 'Oracle Compute Cloud Service', and click on it. The resulting page will look similar to this:
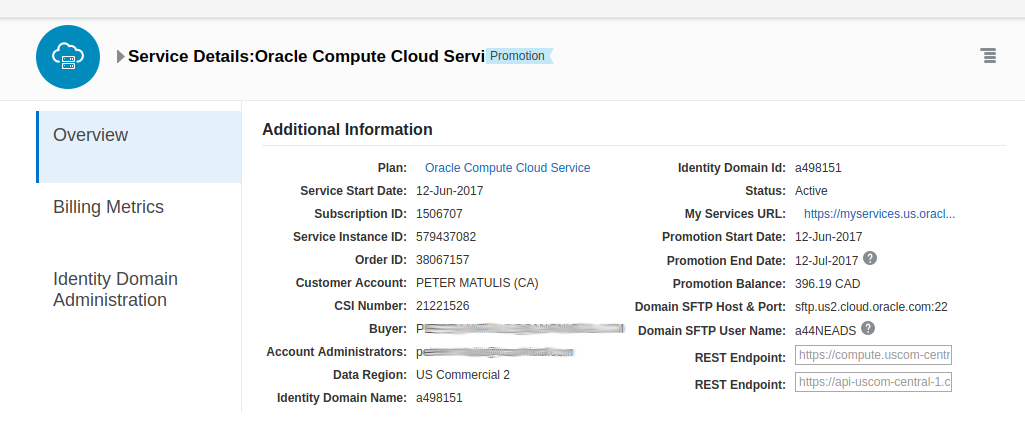
There may be multiple endpoints. In that case, trial and error may be needed below (hint: the endpoint domain should be resolvable using DNS).
You are now ready to use the interactive add-cloud command:
juju add-cloud
Example user session:
Cloud Types
  maas
  manual
  openstack
  oracle
  vsphere

Select cloud type: oracle

Enter a name for your oracle cloud: oracle-cloud

Enter the API endpoint url for the cloud:
https://compute.uscom-central-1.oraclecloud.com/

Cloud "oracle-cloud" successfully added
You may bootstrap with 'juju bootstrap oracle-cloud'
We've called the new cloud 'oracle-cloud' and used an endpoint of 'https://compute.uscom-central-1.oraclecloud.com/'.
Now confirm the successful addition of the cloud:
juju clouds
Here is a partial output:
Cloud            Regions  Default          Type        Description
.
.
.
oracle                 5  uscom-central-1  oracle      Oracle Compute Cloud Service
oracle-cloud           0                   oracle      Oracle Compute Cloud Service
Cloud 'oracle' is for the built-in (for pay) service and cloud 'oracle-cloud' is tied to your trial account.
Add credentials
Use the interactive add-credential command to add your credentials to your
cloud. Below, we add credentials to the trial account cloud:
juju add-credential oracle-cloud
Here is a resulting example user session:
Enter credential name: oracle-cloud-creds

Using auth-type "userpass".

Enter username: javierlarin72@gmail.com

Enter password:

Enter identity-domain: a498151

Credentials added for cloud oracle-cloud.
We've called the new credential 'oracle-cloud-creds' and entered values for 'Username', 'Password', and 'Identity domain'.
Note: The password will not be echoed back to the screen.
Juju networks and spaces
You can optionally link Oracle Compute IP networks and IP exchanges with Juju's networks and spaces.
To do this:
- Navigate to 'My Services URL'.
- Open the left menu (top-left icon) and select 'Compute'.
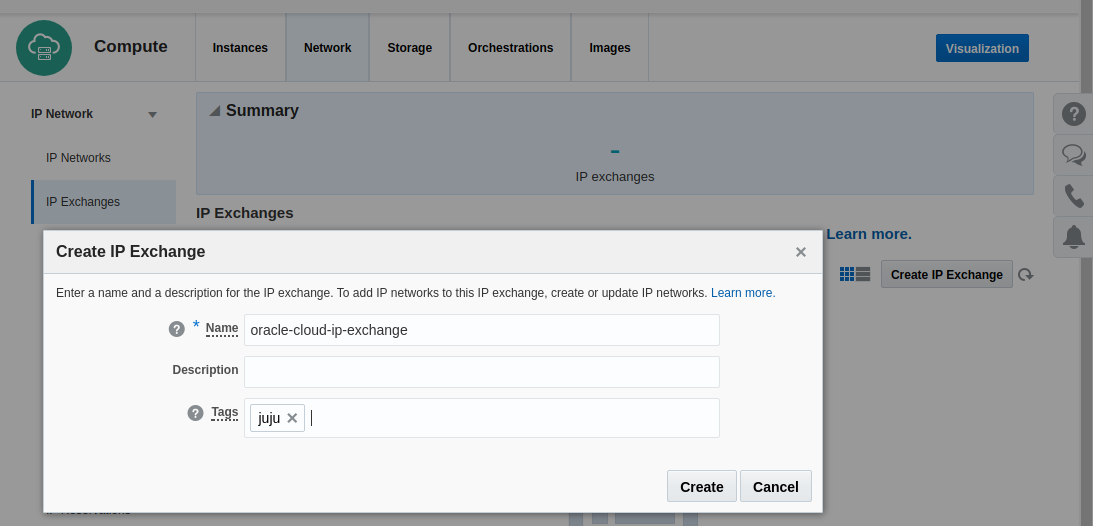
- From the 'Network' tab select 'IP Exchanges' from the menu on the left.
- Click on the 'Create IP Exchange' button and enter a name for the exchange, and optionally, a description and one or more tags.
Now create a network to use this exchange by selecting 'IP Networks' from the menu and clicking on 'Create IP Network':
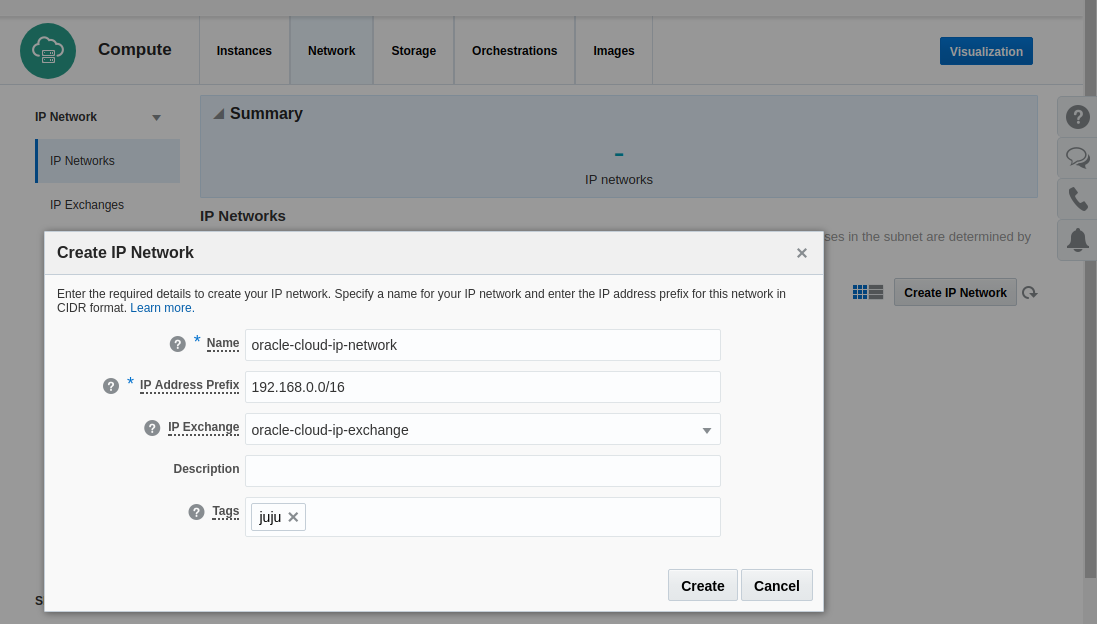
Enter a name, a CIDR formatted address for the 'IP Address Prefix', and an optional description with one or more tags. Use the 'IP Exchange' drop-down menu to select the exchange created previously and click on 'Create'.
When you next create a Juju controller (see below), you'll be able to use these
new subnets and spaces. For example, typing juju subnets will show output
similar to the following:
subnets:
  192.168.0.0/16:
    type: ipv4
    provider-id: /Compute-a498151/javierlarin72@gmail.com/oracle-cloud-ip-network
    status: in-use
    space: oracle-cloud-ip-exchange
    zones:
    - default
Typing juju spaces will list the exchange:
Space                     Subnets
oracle-cloud-ip-exchange  192.168.0.0/16
See How to configure more complex networks using spaces for further details on networks and spaces.
Create the Juju controller
You are now ready to create a Juju controller:
Below, we continue with the trial account cloud:
juju bootstrap oracle-cloud oracle-cloud-controller
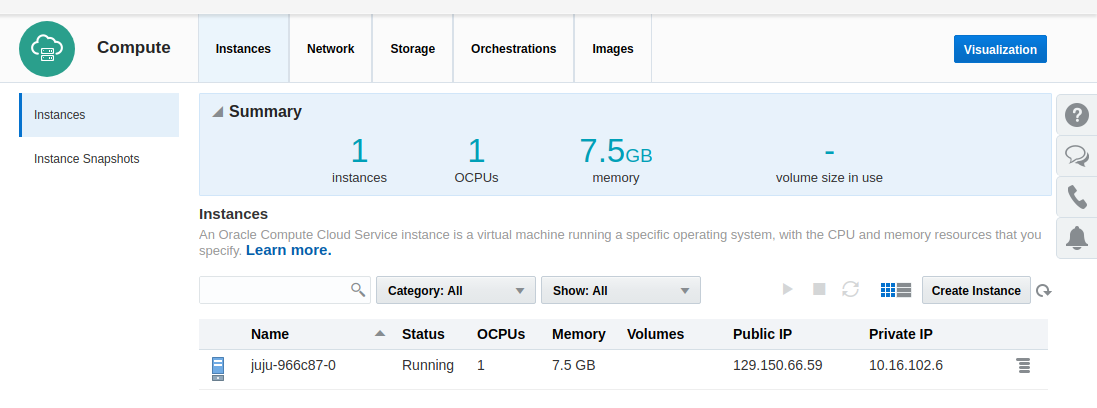
Above, the name given to the new controller was 'oracle-cloud-controller'. Oracle Compute will create an instance to run the controller on.
Once created, you can view the controller as an Oracle Compute instance by navigating to 'My Services URL', opening the left menu (top-left icon), and selecting 'Compute'. The controller should be visible under the 'Instances' tab:
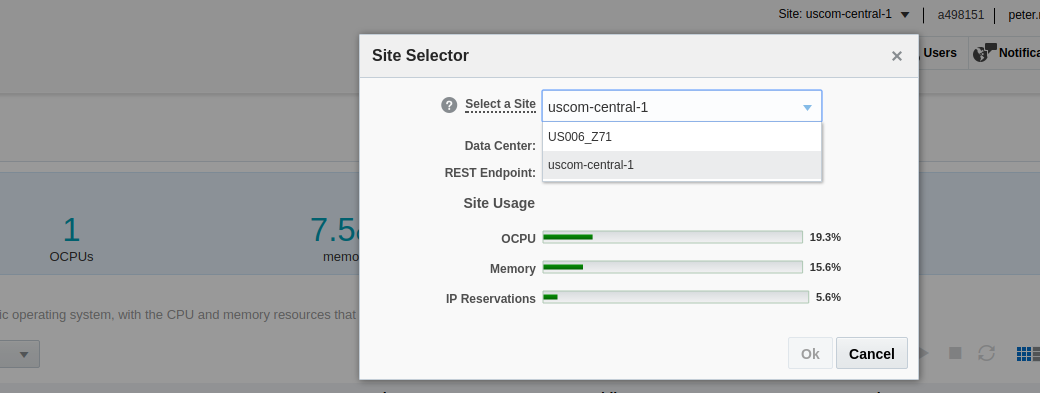
Oracle Compute has the notion of sites (like availability zone or region). You may need to change your site to see your new controller. This is done in the top-right corner:
Next steps
You can now start deploying Juju charms and/or bundles to your Oracle cloud. Continue with Juju by visiting the Models and Introduction to Juju Charms pages.